Teams
In team mode, two to four students work together: the practice VMs of a team share a private network of their own and can reach each other there. This lets your class practise tasks that need more than one computer – a server on one VM, a client on another, a DNS or mail server for the whole team.
You put the teams together, in the Teams tab of your class. Students do not form teams themselves.
What you need to know, in three sentences
- Each team has its own network. Other teams, other classes and Techlogia's systems are not reachable through it.
- Each student is in at most one team per class; a team has at most 4 members.
- Changes to teams apply from the next start of a practice VM. Running VMs keep their network and address until they end.
Team network, names and seats
Each member has a fixed seat (1 to 4) in the team. Each seat comes with a name and an address in the team network – the same on every VM of the team:
| Seat | Name in the team network | Address |
|---|---|---|
| 1 | team-1 |
10.77.0.11 |
| 2 | team-2 |
10.77.0.12 |
| 3 | team-3 |
10.77.0.13 |
| 4 | team-4 |
10.77.0.14 |
So students address each other as team-1, team-2 … rather than with changing addresses. Every VM has an
overview in the file ~/TEAM.txt (login names and seats).
The team network is created on the first start of a team exercise and disappears on its own when no VM of the team is running any more. You do not need to do anything for this.
Seat 1 matters
In the team lessons, the team's server runs on seat 1 (team-1). Put someone there who will definitely
be in the lesson. If that person is missing, swap the seat (see
Change members and seats).
Open the “Teams” tab
Classes and students → open the class → Teams tab (1).
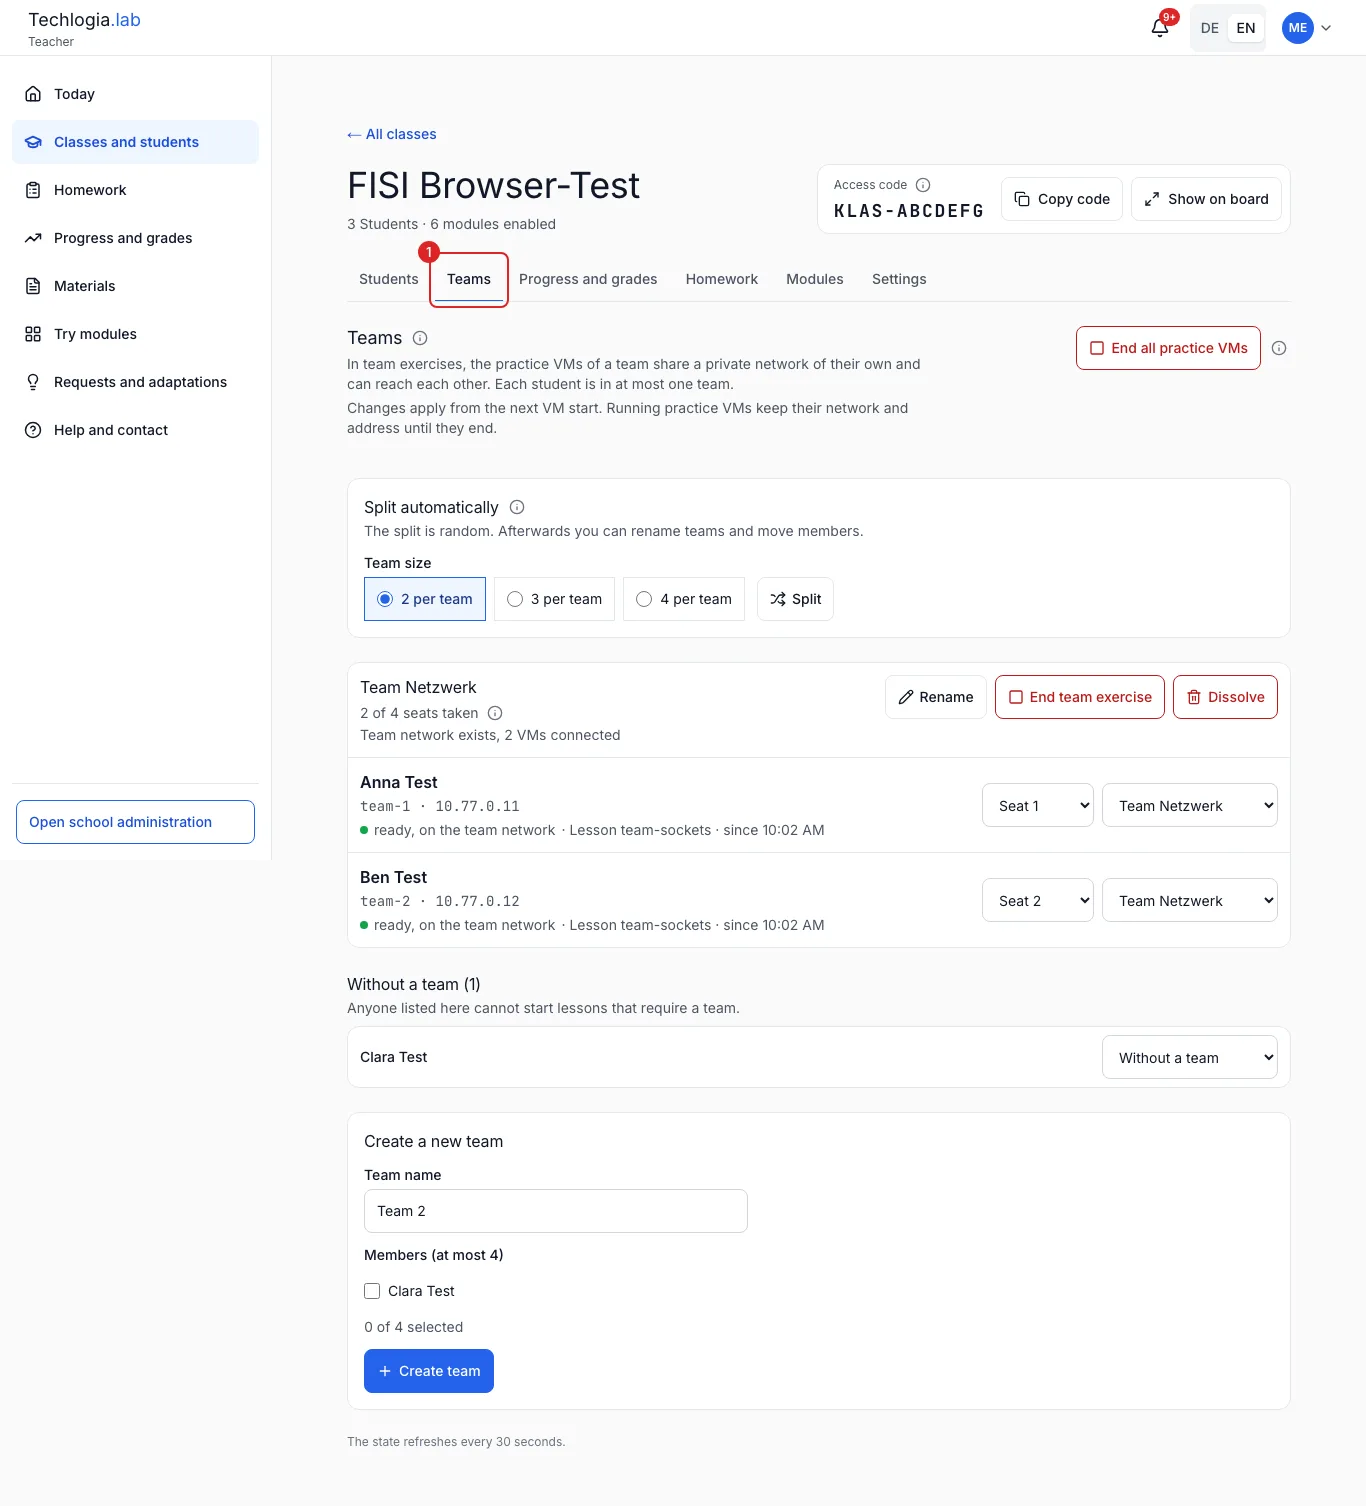
The tab only appears in your own classes. School admins do not see it in other teachers' classes – teams are managed by the teacher who owns the class. If the class has no students yet, add them in the Students tab first.
Split automatically
The fastest way for the whole class:
- Under Split automatically, choose the team size: 2, 3 or 4 per team (1).
- Click Split (2).

The split is random. If the numbers do not divide evenly, no one ends up alone: the remainder is spread over the teams (5 students, size 2 → one team of 3 and one of 2). If a team would then be larger than 4, there is one more team and all become slightly smaller (7 students, size 4 → 4 and 3).
If there are teams already, the Lab asks: Replace existing teams? Split again dissolves all existing teams and forms new ones. You can adjust everything by hand afterwards.
Create a team by hand
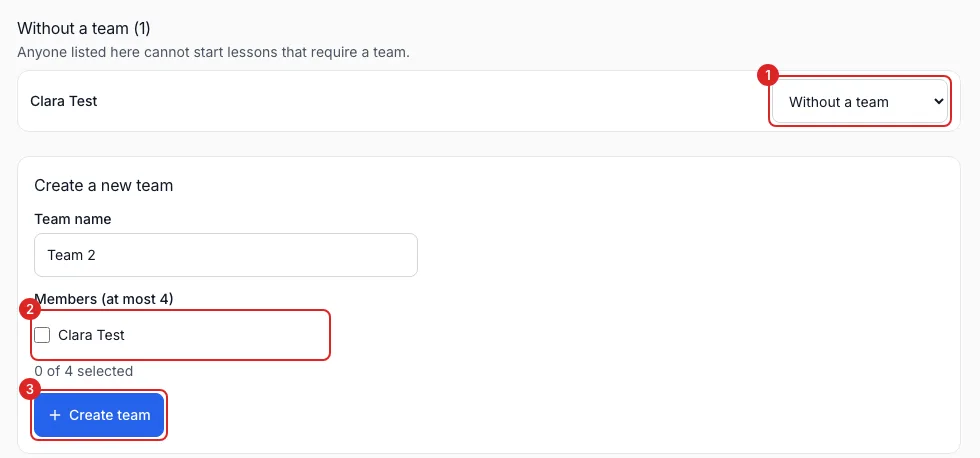
At the bottom of the tab you find everyone Without a team and the form Create a new team:
- Enter the Team name (“Team 2”, “Team 3” … is suggested; up to 60 characters, unique per class).
- Under Members, tick up to 4 people (2).
- Create team (3).
You can also assign a single student without a team to an existing team using the drop-down in their row (1).
No team, no team lesson
Anyone listed under Without a team cannot start lessons that require a team. They see: “Your teacher has not assigned you to a team yet.” As soon as you assign them, they can start – no reload needed.
Change members and seats
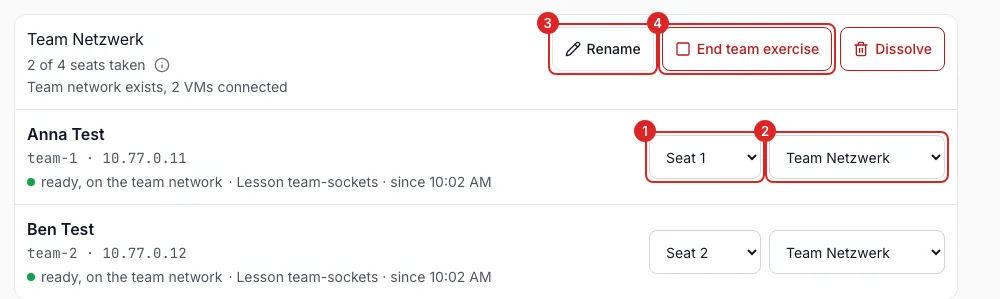
Each team is shown as a card. It shows the name, how many seats are taken, whether the team network currently
exists, and for each member: name, team-… name and address, and the state of their VM (no VM,
VM starting, ready, on the team network) with lesson and start time.
| What you want to do | How |
|---|---|
| Swap seats | Seat drop-down (1) in the row – whoever had that seat gets the previous one |
| Move to another team | Team drop-down (2) – full teams are marked “(full)” |
| Take someone out of the team | Team drop-down → Without a team |
| Rename the team | Rename (3) |
| Dissolve the team | Dissolve – its members are listed under “Without a team” again |
All changes apply from the next start of a practice VM. If the VM of the person who previously had the seat is still running after a seat swap, it must end first: otherwise the new seat holder sees “Your seat in the team is still taken …”. End the team exercise (see below) or wait.
The cards refresh every 30 seconds while the tab is open.
End a team exercise
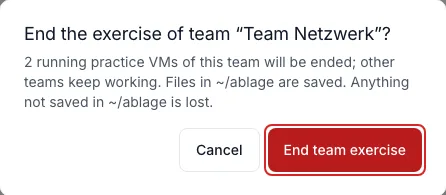
- End team exercise (4) on a team card ends the running practice VMs of this one team. Other teams keep working. The button only appears while something is running in that team.
- End all practice VMs at the top right of the tab ends all running practice VMs of the class – including students without a team. This is the same as End lesson in the Students tab (see Help during the lesson).
Both buttons ask first and state how many VMs are affected. Only the red button in the dialog ends the exercise; Cancel leaves everything running.
Only ~/ablage is kept
Files in the folder ~/ablage are saved. Everything else on the VMs is lost.
The module “Network services in a team”
Since Lab v2.35.0 there is the module Network services in a team (vocational school, LF9/LF11, IT specialists). It has three lessons with 16 tasks in total, about 135 minutes. All three lessons require a team – they cannot be started without one.
| Lesson | What it covers | Tasks |
|---|---|---|
| Sockets in a team | Explore the team network, TCP server on team-1, your own client from every VM, UDP with an answer, one server for everyone at once, what to do when the server does not answer |
6 |
| DNS in a team with Technitium | Install the Technitium DNS server on team-1, change the password and set a forwarder, zone team.lan with your own records, make your VM ask the team DNS, MX record |
5 |
| Mail server in a team with Stalwart | Stalwart mail server on team-1, your own mailbox, send a mail to a team member, fetch mail via IMAP, why mail without authentication ends up in spam |
5 |
Mail only travels within the team network; nothing is sent to the outside.
Within the module, a team can move on to the next lesson on the same VMs – the DNS server from lesson 2 then keeps running for the mail server in lesson 3.
How to prepare the lesson
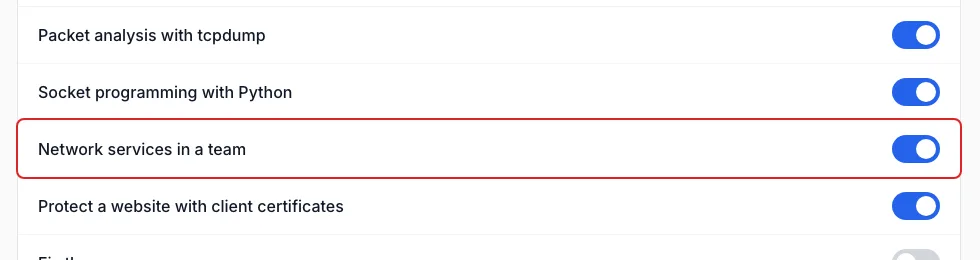
- In the Modules tab, switch on the module Network services in a team – or use Copy unlocked modules to unlock the learning path Network services in a team (tcpdump → sockets → network services in a team) in one go.
- In the Teams tab, form teams and check who is on seat 1.
- Optionally give the first lesson as homework.
A lesson plan for three double lessons, worksheets and notes on organisation are available under Materials for the module.
Schools only
Team lessons exist only in classes. Anyone learning in the Lab without a class has no team.
What students see
When a student opens a team lesson, the box Your team shows the team members, their seat (team-1 …) and
their state. Without a team, starting is blocked with a note that the teacher still has to assign them. Details
for students: Learning in the Lab.
Frequently asked questions
“A student cannot start the team lesson”
- They are listed under Without a team → assign them to a team.
- “Your seat in the team is still taken” → after a seat swap, the previous holder's VM is still running. Use End team exercise or wait a few minutes.
- “Too many team exercises are running at the same time” → try again in a few minutes; if it happens again, contact info@techlogia.de.
“The VMs cannot reach each other”
- Is the VM on seat 1 running yet? Without it there is no server for the others to talk to.
- Has someone switched on a firewall on their VM (
ufw enable)? It also blocks the team network.
“Can I form teams across several classes?”
No. A team always belongs to one class.
“Who can see who is in which team?”
You as the teacher and the team members themselves (with their login names from the class). Every change to teams is logged.